
IEC-fans: Replacing fan impeller

|
Warning:
Each fan is equipped with a fan guard and a lockable service switch. The wire spacing in the fan guard and the safety distance of the blade correspond to the European safety standard. The safety guards are protections from contact only. Do not remove the safety guard before the fan is shut down. The rotating impeller may catch in your clothes, cut you or pull you in.
|
 |
Warning:
Before starting the service operation, ensure that the electrical supply is reliably isolated; use the lockout/tag-out system. Always check with a voltmeter that the unit is electrically isolated and shut off. 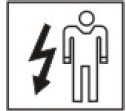   |
|
|
Warning:
Sharp edges. Use protection glasses, safety gloves, shoes and clothes.
|


Fan unit:
- Service switch
- Fan guard
- Junction box
- Fan's locking screw
- Motor's fixing screw
To replace the fan impeller in IEC-fans:
- To remove the fan guard, unscrew the fixing screws.
- To remove the fan impeller, unscrew the locking screw.
- Pull out the fan impeller with an extractor.
- Clean and lubricate the shaft.
-
Place the new impeller into the shaft.
Note: Keep the wedge with the impeller.CAUTION: Do not knock the impeller into the shaft. The motor bearings damage easily.


-
Spread silicone rubber sealing spray at the shaft end HI-TEMP 343 RTV.
Silicone rubber sealing spray prevents the water running along the joint between the impeller hub and the motor shaft into the motor.
- Place a washer at the shaft end on the silicone rubber sealing.
-
Lock the impeller hub into the motor axle with a fixing screw.
Use a strong enough torque (see Tightening torques for bolts grade 8.8 (EN ISO 898-1) ). When tightening the fixing screw, some sealing compound presses out through the washer edge and hole. This shows that you have used enough silicone rubber sealing spray.

- Place the fan guard.
- Check the fan visually on a test run.